The Blog
Self-hosting a persistent AI agent: Hermes Agent on your own VM
SeriesHermes AgentEpisode 1 of 2
- Why self-host an AI agent?
- What we’re going to build
- Step 1: the machine
- Step 2: Docker, with a ceiling on logs
- Step 3: the Hermes stack
- Step 4: configuration and secrets
- Step 5: start it, and lock it down
- Step 6 (optional): a domain name and HTTPS
- Step 7 (optional): internal DNS, and the “fallback resolver” trap
- Verifying it all holds up
- Troubleshooting
- Going further: making all of this replayable
- The role of vibecoding in this project
- What it changes day to day
Part 1 of the series “Hermes Agent” — a hands-on journey around a self-hosted persistent AI agent, from deploying it on your own VM to weaving it into your daily workflow.
Why self-host an AI agent?
I use AI assistants all day long, but always inside a chat window: I ask a question, copy the answer, paste it somewhere else. The agent has no memory between sessions, no access to my machines, and it does nothing while I sleep.
Hermes Agent fills exactly that gap: a persistent agent that keeps its memories, skills and sessions on your disk, reachable from Telegram or a web dashboard, and that you can hand tools to.
The obvious objection is the GPU. It goes away once you split the problem in two: the agent runs at your place, the model runs elsewhere. Inference goes out to an OpenAI-compatible endpoint — DeepSeek, Mistral, OpenAI, or your own Ollama — and what stays on your machine is what actually matters: the memory, the sessions, the configuration. A 4-core, 8 GB VM is enough. No graphics card, no PCI passthrough.
This tutorial is standalone. It assumes no homelab, no Proxmox, no Ansible: just a Linux VM you have sudo on.
What we’re going to build
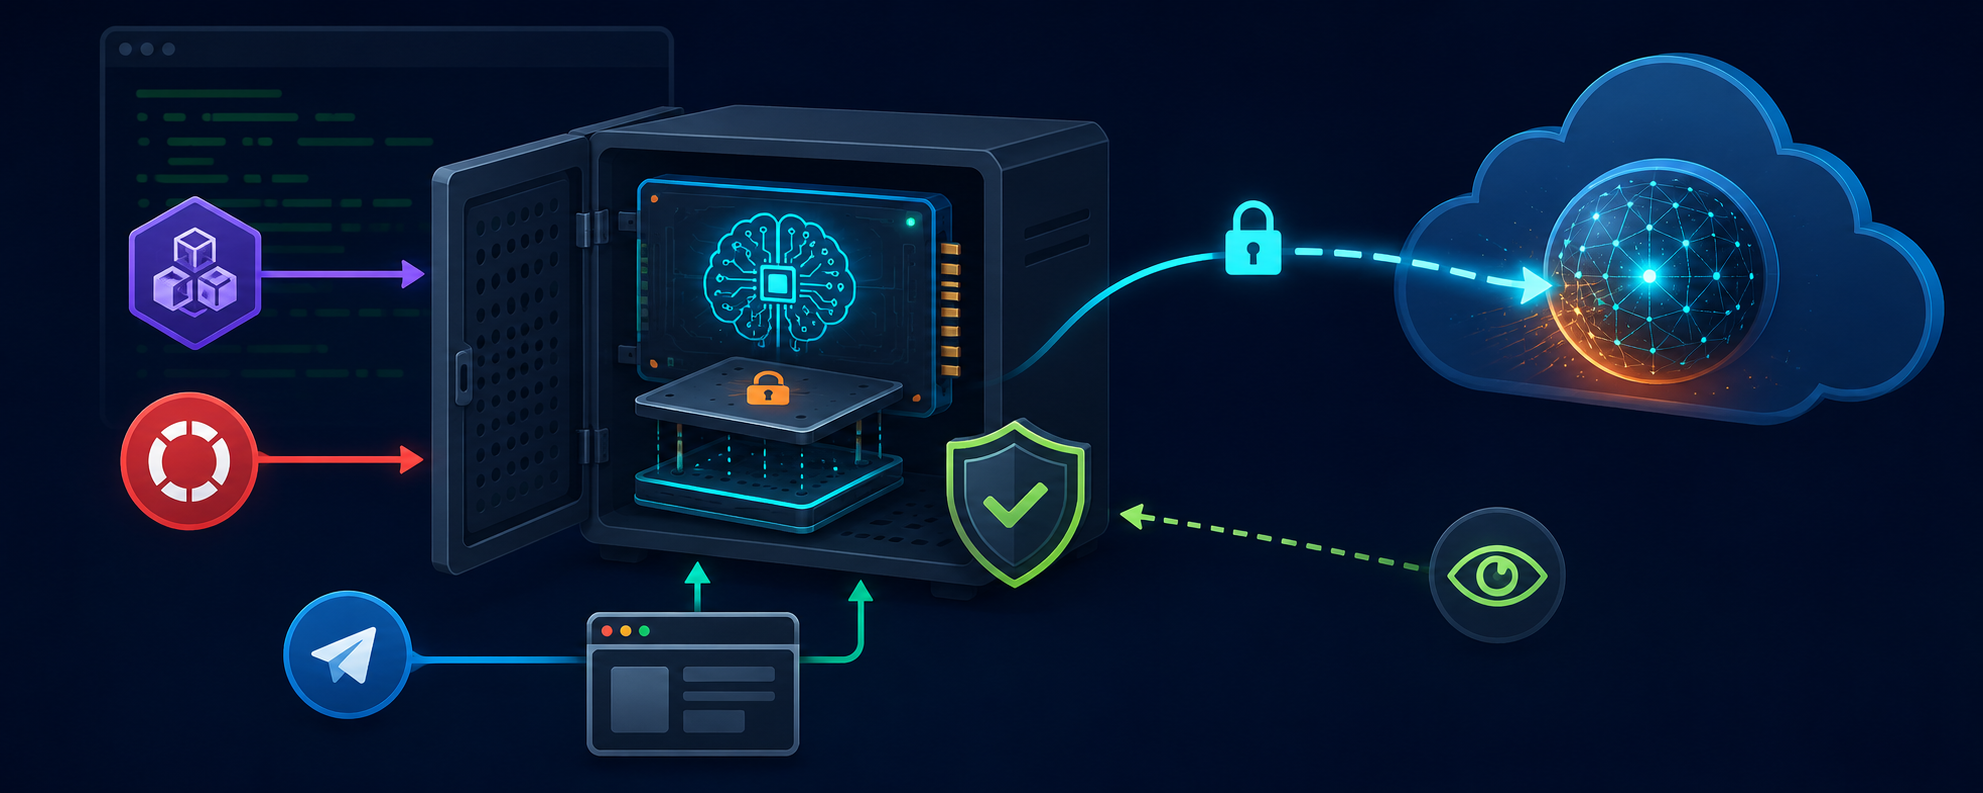
A VM running two containers — the gateway (the brain) and the dashboard (the web UI) — sharing a data volume, with a configuration layer that you control and the agent cannot overwrite.
                     your VM
      ┌───────────────────────────────────────┐
      │  UFW: 22/tcp, everything else closed  │
      │                                       │
      │   hermes (gateway)   127.0.0.1:8642   │
      │   hermes-dashboard   127.0.0.1:9119   │
      │        │                              │
      │        ├── /opt/hermes/managed  →  /etc/hermes:ro
      │        │     ├── config.yaml   ← you
      │        │     └── .env          ← you (secrets)
      │        │                              │
      │        └── /opt/hermes/data    →  /opt/data
      │              └── memories/ skills/ sessions/  ← the agent
      └───────────────────┬───────────────────┘
                          │ HTTPS
                          ▼
              OpenAI-compatible endpoint
         (DeepSeek, Mistral, OpenAI, Ollama…)
Steps 1 to 5 give you a working agent, reachable through an SSH tunnel. Steps 6 and 7 are optional: they add a domain name, HTTPS and internal DNS, if you want to reach it from your other machines.
Prerequisites:
- A Linux VM — Ubuntu 24.04 or Debian 13 — with 4 vCPUs, 8 GB RAM, 32 GB disk, and
sudoaccess - An API key from a provider exposing an OpenAI-compatible endpoint
- About 30 minutes, most of it waiting on the first
docker pull
In every example, <VM_IP> is this VM’s address and <PROXY_IP> your reverse proxy’s, if you have one. Replace them.
Step 1: the machine
Two paths. Take the one that matches what you have — they converge on the same thing: an Ubuntu 24.04 VM with a fixed IP and your SSH key.
Option A — on Proxmox, with Terraform
If you have a Proxmox VE node and a cloud-init template, this resource is enough. It’s self-contained: no module, nothing to install beyond the provider.
terraform {
  required_version = ">= 1.11.0"
  required_providers {
    proxmox = {
      source  = "bpg/proxmox"
      version = ">= 0.93.0, < 1.0.0"
    }
  }
}

resource "proxmox_virtual_environment_vm" "hermes" {
  name      = "hermes"
  node_name = "pve"          # your node name
  vm_id     = 9030
  on_boot   = true           # the agent runs 24/7

  clone {
    vm_id = 9001             # your cloud-init template
    full  = true
  }

  agent {
    enabled = true
    timeout = "1s"
  }

  cpu {
    cores = 4
    type  = "host"
  }

  memory {
    dedicated = 8192
    floating  = 2048         # ballooning: hands unused RAM back to the node
  }

  # Without this controller, Proxmox accepts iothread and silently ignores it
  scsi_hardware = "virtio-scsi-single"

  disk {
    datastore_id = "local-lvm"
    interface    = "scsi0"
    size         = 32
    file_format  = "raw"
    discard      = "on"
    ssd          = true
    iothread     = true
  }

  network_device {
    bridge   = "vmbr0"
    model    = "virtio"
    firewall = true
  }

  initialization {
    dns {
      servers = ["1.1.1.1"]
    }
    ip_config {
      ipv4 {
        address = "192.168.1.30/24"
        gateway = "192.168.1.1"
      }
    }
    user_account {
      username = "ansible"
      keys     = [trimspace(file("~/.ssh/id_rsa.pub"))]
    }
  }

  startup {
    order      = 10
    up_delay   = 30
    down_delay = 60
  }
}
Two details that are expensive to relearn:
scsi_hardware = "virtio-scsi-single" is not decoration. Without that controller, Proxmox accepts the iothread = true parameter and ignores it, without a single warning. You believe you enabled an optimization that doesn’t exist.
The 32 GB disk is deliberately small: growing later is non-destructive (qm resize then growpart), shrinking is not. Might as well start tight.
terraform init
terraform applyCareful: changing the
initialization {}block of an already running VM changes nothing inside the guest.terraform planreports anupdate in-place, applies it, and declares success — but cloud-init only renders/etc/netplan/50-cloud-init.yamlon first boot and never reads it again. Your IaC declares compliance while the machine disagrees. To force a rebuild:terraform apply -replace='proxmox_virtual_environment_vm.hermes'
Option B — any other VM
A VPS at a hosting provider, a VirtualBox or libvirt VM on your laptop, a cloud instance, bare metal: all fine. You need:
- A fresh Ubuntu 24.04 or Debian 13
- 4 vCPUs, 8 GB RAM, 32 GB disk (the agent fits in less, but sessions and logs grow)
- SSH key access, and
sudo - A stable IP address
Nothing that follows is Proxmox-specific. Go straight to step 2.
💡 On a VPS exposed to the internet, do not skip step 5: the dashboard must never listen on a public interface without a firewall in front of it.
Step 2: Docker, with a ceiling on logs
Standard installation from the official repository:
# Prerequisites and repository key
sudo apt-get update
sudo apt-get install -y ca-certificates curl
sudo install -m 0755 -d /etc/apt/keyrings
sudo curl -fsSL https://download.docker.com/linux/ubuntu/gpg \
  -o /etc/apt/keyrings/docker.asc
sudo chmod a+r /etc/apt/keyrings/docker.asc

# Repository
echo "deb [arch=$(dpkg --print-architecture) signed-by=/etc/apt/keyrings/docker.asc] \
https://download.docker.com/linux/ubuntu $(. /etc/os-release && echo "$VERSION_CODENAME") stable" \
  | sudo tee /etc/apt/sources.list.d/docker.list > /dev/null

sudo apt-get update
sudo apt-get install -y docker-ce docker-ce-cli containerd.io \
  docker-buildx-plugin docker-compose-plugin
Then the setting not to forget:
sudo tee /etc/docker/daemon.json > /dev/null <<'EOF'
{
  "log-driver": "json-file",
  "log-opts": {
    "max-size": "10m",
    "max-file": "3"
  }
}
EOF

sudo systemctl restart docker
The default json-file driver bounds neither file size nor file count. An agent running 24/7, with sessions and sub-agents, writes a lot. Without a ceiling, / fills up without a single warning — and on a 32 GB disk that happens sooner than you’d think. With this config, each container is capped at 30 MB.
docker --version && docker compose versionStep 3: the Hermes stack
The directory layout
Three directories, and their permissions matter as much as their existence:
sudo mkdir -p /opt/hermes/data /opt/hermes/managed

# The agent's volume: it writes here, as UID 1000
sudo chown 1000:1000 /opt/hermes/data
sudo chmod 700 /opt/hermes/data

# Your configuration layer: root owns it, the agent reads it
sudo chown root:1000 /opt/hermes/managed
sudo chmod 750 /opt/hermes/managed
Which gives:
/opt/hermes/
├── docker-compose.yml
├── data/                  # the agent writes here — UID 1000
│   └── memories/ skills/ sessions/
└── managed/               # you write here — root, mounted read-only
    ├── config.yaml
    └── .env
The container runs internally under a dedicated user; PUID/PGID remap it onto the volume’s owner on the host side. Without that, files written by the agent would be unreadable from the VM.
The Compose file
# /opt/hermes/docker-compose.yml
services:
  gateway:
    image: nousresearch/hermes-agent:v2026.8.18
    container_name: hermes
    restart: unless-stopped
    network_mode: host
    volumes:
      - /opt/hermes/data:/opt/data
      - /opt/hermes/managed:/etc/hermes:ro
      # Only useful if your internal services use a private CA — see step 6
      - /etc/ssl/certs/ca-certificates.crt:/etc/ssl/certs/ca-certificates.crt:ro
    environment:
      - PUID=1000
      - PGID=1000
    command: ["gateway", "run"]
    deploy:
      resources:
        limits:
          memory: 4G
          cpus: "2.0"

  dashboard:
    image: nousresearch/hermes-agent:v2026.8.18
    container_name: hermes-dashboard
    restart: unless-stopped
    depends_on:
      - gateway
    network_mode: host
    volumes:
      - /opt/hermes/data:/opt/data
      - /opt/hermes/managed:/etc/hermes:ro
      - /etc/ssl/certs/ca-certificates.crt:/etc/ssl/certs/ca-certificates.crt:ro
    environment:
      - PUID=1000
      - PGID=1000
    command:
      - "dashboard"
      - "--host"
      - "127.0.0.1"       # loopback by default — see step 6 to expose it
      - "--port"
      - "9119"
      - "--no-open"
    deploy:
      resources:
        limits:
          memory: 4G
          cpus: "2.0"
The image tag is pinned. An agent that updates itself while you sleep is an agent whose behaviour you can no longer explain.
The resource limits aren’t cosmetic either: an agent stuck in a loop shouldn’t take the VM down with it.
Why network_mode: host
The upstream repo ships two Compose variants. They are not equivalent, and the choice has security consequences:
network_mode: host | bridge + ports: | |
|---|---|---|
| Docker NAT rules | none | created |
| UFW | applies normally | bypassed |
| Local name resolution | inherited from the host | not inherited |
Docker inserts its DNAT rules before UFW’s in the netfilter chain. Publishing a port with ports: exposes it to the whole network while ufw status keeps displaying deny. A green light that lies — the worst category of configuration.
host mode has a second, useful effect: the containers share the VM’s network stack. They resolve names exactly as it does, and an Ollama running on the same machine is reachable at http://127.0.0.1:11434/v1 with no further setup.
Step 4: configuration and secrets
This is the step that deserves the most attention, because it decides who owns what between you and the agent.
config.yaml — the inference provider
# /opt/hermes/managed/config.yaml
providers:
  deepseek:
    name: DeepSeek
    base_url: https://api.deepseek.com/v1
    key_env: DEEPSEEK_API_KEY
    default_model: deepseek-v4-flash

model:
  provider: deepseek
  default: deepseek-v4-flash
key_env carries only the name of the environment variable — never the value. Secrets live in .env, and nowhere else.
Any OpenAI-compatible endpoint is declared on this pattern. A few examples:
| Provider | base_url |
|---|---|
| DeepSeek | https://api.deepseek.com/v1 |
| OpenAI | https://api.openai.com/v1 |
| Mistral | https://api.mistral.ai/v1 |
| Ollama, on the same VM | http://127.0.0.1:11434/v1 |
.env — the secrets
# /opt/hermes/managed/.env
DEEPSEEK_API_KEY=sk-your-key

# Gateway API: firewalled off, but the key stays cheap defense in depth
API_SERVER_ENABLED=true
API_SERVER_KEY=<openssl rand -hex 32>

# Dashboard authentication
HERMES_DASHBOARD_BASIC_AUTH_USERNAME=admin
HERMES_DASHBOARD_BASIC_AUTH_PASSWORD=<your password>
HERMES_DASHBOARD_BASIC_AUTH_SECRET=<openssl rand -base64 32>

# Optional — Telegram
TELEGRAM_BOT_TOKEN=<BotFather token>
TELEGRAM_ALLOWED_USERS=<your numeric Telegram ID>
Then, without exception:
sudo chown root:1000 /opt/hermes/managed/config.yaml /opt/hermes/managed/.env
sudo chmod 640 /opt/hermes/managed/config.yaml /opt/hermes/managed/.env
0640 root:1000 rather than upstream’s 0644: Hermes controls no file mode, only the OS decides. The agent reads through the group and cannot rewrite those files.
HERMES_DASHBOARD_BASIC_AUTH_SECRETsigns the session tokens. Without it, your sessions don’t survive a container restart — you log in again every time without understanding why.
⚠️ The Telegram allowlist is not optional if you enable Telegram. Without
TELEGRAM_ALLOWED_USERS, the gateway logs “No env user allowlists configured” and falls back to pairing: it works, but the door stays open to anyone who knows the bot until someone pairs.
The boundary between your automation and the agent
Here’s why everything goes into managed/ and nothing into data/.
Hermes has a configuration layer called managed scope: the directory mounted at /etc/hermes, whose keys are merged on top of the data volume’s config.yaml and win at the leaf.
| Owner | Enforcement | |
|---|---|---|
/opt/hermes/managed/{config.yaml,.env} | you | root:1000, mode 0640, mounted :ro |
/opt/hermes/data/** | the agent | writable by UID 1000 |
The boundary isn’t a documented convention, it’s a filesystem property. You pin model.provider without touching model.default or platforms:, which the agent and its setup wizards write on their side:
model.provider  : deepseek                          ← pinned by you
model.default   : user-model                        ← the agent's value survives
platforms       : {"telegram": {"enabled": true}}   ← untouched
This is a per-key boundary, not a per-file one. The distinction looks theoretical until the day it costs you an outage.
My first version drew the boundary per file: my automation owned all of config.yaml and cleaned up the volume’s .env, on the grounds that it was “superseded”. It held as long as the other writers touched the same keys — overwriting was then the correct behaviour. It broke on the first writer that added a different key: the Telegram setup wizard wrote its token into the volume, a key my layer didn’t carry. The cleanup took it out. The agent stopped answering on Telegram — no error, no trace, the adapter simply stopped starting. The deployment, meanwhile, was entirely green.
The rule that comes out of it fits in one sentence: never bulk-delete a file the agent also writes to. If a key must become unoverridable, add it to your managed layer — don’t erase the agent’s file. A leftover .env in the volume is harmless: your layer is merged on top and wins.
⚠️ The directory mode is the critical parameter. If the agent cannot traverse
/etc/hermes,stat()raises and Hermes returnsNone, commenting the value# absent. No log, no error: your configuration is simply no longer applied. An unreadable file produces a loud warning; an untraversable directory is mute. Hence the0750 root:1000from step 3 — traversable by the agent’s group, writable by nobody but root.
That failure mode is silent, so it has to be tested explicitly, and not just once. After every configuration change:
docker exec -u 1000 hermes python3 -c \
  'from hermes_cli import managed_scope as ms; \
   ms.invalidate_managed_cache(); \
   print(sorted(ms.managed_config_keys()))'
If model.provider doesn’t appear in that list, your layer isn’t applied — whatever else says otherwise.
Step 5: start it, and lock it down
cd /opt/hermes
sudo docker compose up -d
sudo docker compose ps
Then the firewall, before anything else:
sudo apt-get install -y ufw
sudo ufw default deny incoming
sudo ufw default allow outgoing
sudo ufw allow 22/tcp
sudo ufw enable
sudo ufw status numbered
Outbound stays allow: that’s where inference goes, over HTTPS. Nothing else needs opening at this stage — the dashboard listens on 127.0.0.1.
To reach it from your machine, an SSH tunnel is enough:
ssh -L 9119:127.0.0.1:9119 your-user@<VM_IP>
# then http://localhost:9119 in the browser
That’s the safest configuration, and it stands on its own. If it suits you, you’re done: go to the verification section.
Step 6 (optional): a domain name and HTTPS
The SSH tunnel gets old fast if you check the agent from several machines. What follows puts a reverse proxy in front.
Expose the dashboard to the proxy, and to it alone
Change the bind in the Compose file:
    command:
      - "dashboard"
      - "--host"
      - "0.0.0.0"
      - "--port"
      - "9119"
      - "--no-open"
Then restrict by source:
sudo ufw allow from <PROXY_IP> to any port 9119 proto tcp comment 'dashboard via proxy'
sudo docker compose up -d
The from <PROXY_IP> is the heart of the rule. Opening port 9119 to the whole network would defeat the purpose of the proxy: centralized TLS and authentication are worth nothing if you can bypass them by typing the IP and the port.
The dashboard refuses to start on a non-loopback interface when no auth provider is registered. That’s good behaviour — but the error message doesn’t say “go fill in your
.env”. If you skipped the threeHERMES_DASHBOARD_*variables in step 4, this is where it shows.
The vhost, proxy side
With Caddy the configuration is three lines, Let’s Encrypt certificate included:
agent.example.com {
    reverse_proxy <VM_IP>:9119
}
Then add this to config.yaml, so redirects point at the public URL rather than the actual listen address:
dashboard:
  public_url: "https://agent.example.com"
Order of operations: create the UFW rule before publishing the vhost. The other way round, your proxy advertises a service it cannot reach, and you debug the proxy while the problem is in the firewall.
If your proxy uses a private CA
On an internal domain (no Let’s Encrypt), your proxy most likely serves TLS signed by a private authority — the one Caddy generates automatically, for instance. For the agent to reach your other internal services without -k, the VM and the containers must trust that authority.
# Your CA's root certificate, fetched from the proxy
sudo cp root.crt /usr/local/share/ca-certificates/internal.crt
sudo update-ca-certificates
What gets updated is the system bundle /etc/ssl/certs/ca-certificates.crt — the very one the Compose file from step 3 mounts into the containers, at the path they already read. A docker compose up -d propagates it.
That mount is preferred over SSL_CERT_FILE, REQUESTS_CA_BUNDLE or NODE_EXTRA_CA_CERTS for a simple reason: each covers one library, and which one matters depends on the HTTP client implementation. The path, on the other hand, is read by all of them.
Two traps not to relearn:
The extension is significant. update-ca-certificates only picks up files ending in .crt. A .pem dropped into that directory is silently ignored: no error, no effect.
Don’t look for the subject with grep. The bundle is a concatenation of base64 PEM blocks: the CN appears nowhere in clear text. grep "My Authority" returns 0 even when the CA is perfectly installed. You have to decode first:
openssl crl2pkcs7 -nocrl -certfile /etc/ssl/certs/ca-certificates.crt \
  | openssl pkcs7 -print_certs -noout | grep -c 'My Authority'
Finally, check both sides from inside the container — not just the one you care about:
docker exec -u 1000 hermes python3 - <<'EOF'
import urllib.request
for url in ("https://a-service.internal/", "https://api.deepseek.com/"):
    try:
        urllib.request.urlopen(url, timeout=10)
        print("ok     ", url)
    except Exception as exc:
        print("FAILED ", url, exc)
EOF
The first probe alone wouldn’t be enough: mounting the host bundle over the container’s can perfectly well add your private CA while dropping a public one. Inference would die, with a thoroughly non-obvious cause.
Step 7 (optional): internal DNS, and the “fallback resolver” trap
Only read this step if your agent has to resolve internal names — a service on .lan, .internal, or your private domain. It documents an outage that has nothing to do with Hermes and that a lot of people inflict on themselves.
The natural reflex, when you have an internal DNS, is to declare it with a public fallback:
DNS=192.168.1.71 1.1.1.1That is not a safe fallback. It’s a domain-blind, sticky failover list:
- one timeout from the internal resolver moves resolution to
1.1.1.1, permanently; - from there, your internal names return NXDOMAIN — a valid answer, so nothing ever switches back;
- nothing goes down. No alert. Only internal names vanish, silently.
I lived it: one morning, no internal name resolved from the VM anymore. The internal DNS server was perfectly healthy — a direct query answered correctly. systemd-resolved had simply switched to its second server and stayed there.
And systemd-resolved cannot fix this on its own: per-domain routing (Domains=~internal) requires per-link DNS servers, which a single-interface VM fed by cloud-init cannot offer. So the routing has to live somewhere else. dnsmasq as a local resolver does the job:
        before (broken)                        after
   ┌──────────────────┐                 ┌──────────────────┐
   │ systemd-resolved │  sticky         │ systemd-resolved │
   │  internal DNS    │  failover       │    127.0.0.1     │  single upstream
   │  1.1.1.1         │  → switched     └────────┬─────────┘  → no failover
   └──────────────────┘    and stayed            │               logic left
                                        ┌────────▼─────────┐
                                        │     dnsmasq      │
                                        │ .internal → internal DNS (pinned)
                                        │ everything else → 1.1.1.1 / 8.8.8.8
                                        └──────────────────┘
sudo apt-get install -y dnsmasq
sudo tee /etc/dnsmasq.d/internal.conf > /dev/null <<'EOF'
# Pinned by domain: NEVER falls back to a public resolver
server=/internal/192.168.1.71
server=1.1.1.1
server=8.8.8.8
listen-address=127.0.0.1
bind-interfaces
EOF
sudo systemctl restart dnsmasq
# PROVE it answers, BEFORE pointing the system at it
dig +short a-service.internal @127.0.0.1That check is the guard rail for the whole step. Until it answers, don’t touch netplan: if you point the system at a mute dnsmasq, you lose all resolution — including the resolution you’d need to download whatever fixes it.
sudo tee /etc/netplan/99-dns-local.yaml > /dev/null <<'EOF'
network:
  version: 2
  ethernets:
    eth0:                      # adapt the interface name
      nameservers:
        addresses: [127.0.0.1]
EOF

sudo chmod 600 /etc/netplan/99-dns-local.yaml
sudo netplan apply

# Verify through the REAL path (nsswitch → resolved → dnsmasq), not through dig
getent hosts a-service.internalgetent, not dig: dig queries the server directly and bypasses resolved. It would tell you everything is fine while applications resolve nothing.
The trade-off, accepted on purpose: server=/internal/ is pinned by domain and never falls back to a public resolver. If your internal DNS goes down, internal names become unavailable instead of wrongly NXDOMAIN. A loud failure instead of a silent one — which is exactly what you want.
Rollback, if needed: sudo rm /etc/netplan/99-dns-local.yaml && sudo netplan apply.
Verifying it all holds up
# Both containers are running
sudo docker compose -f /opt/hermes/docker-compose.yml ps

# The ports listen where you think they do
sudo ss -tlnp | grep -E "8642|9119"

# The firewall says what you think it says
sudo ufw status numbered

# The inference provider actually resolved
sudo docker exec hermes hermes status
#   Model:     deepseek-v4-flash
#   Provider:  DeepSeek
#   DeepSeek   ✓ sk-d...
The last one is the most important of the four, and the troubleshooting below explains why.
Troubleshooting
The agent answers, but ignores your provider
A malformed providers: block raises no error: Hermes silently falls back to the auto provider. The agent keeps answering, with another model, and says nothing about it. Always check what actually resolved, with hermes status — it’s the only check that separates “it works” from “it works as intended”.
hermes status shows .env file: ✗ not found
Expected — not a fault. That line reports the user-scope .env, the one in the data volume — which this design deliberately leaves empty: your secrets are in the managed layer. What matters is the two lines below it:
  .env file:    ✗ not found        <- normal
  Model:        deepseek-v4-flash
  Provider:     DeepSeek           <- this is what proves the key resolved
A genuine problem looks different: Provider falling back to auto, or your provider showing ✗ (not set) under API Keys.
The dashboard container refuses to start
Refusing to bind dashboard to 0.0.0.0 — the auth gate engages on
non-loopback binds, but no auth providers are registered.
The three HERMES_DASHBOARD_* variables are missing or empty. Back to step 4.
Your configuration doesn’t seem to be taken into account
Replay the managed-layer check at the end of step 4. If model.provider isn’t in the pinned keys, check the directory mode: /opt/hermes/managed must be traversable by the agent’s group (0750 root:1000). It’s the most silent failure mode in this whole tutorial.
The disk is filling up
Check that /etc/docker/daemon.json is in place and that Docker was restarted since:
docker inspect hermes --format '{{ .HostConfig.LogConfig }}'Containers created before the daemon restart keep their old logging configuration. They have to be recreated.
Going further: making all of this replayable
This tutorial describes manual steps, and that’s fine for understanding. But a self-hosted agent is a production service like any other: the day the VM dies, you’ll want to rebuild it without re-reading this article.
That’s exactly what the hermes/ sub-project of my TiPunchLabs/homelab monorepo does — and it’s what I used as a reference to write this guide. Every step above maps to an idempotent Ansible role:
| Step in this tutorial | Role |
|---|---|
| 1 — the machine | terraform/ |
| 2 — Docker + logs | docker |
| 3, 4, 5 — the stack, configuration, firewall | hermes_agent, security_hardening |
| 6 — the private CA | internal_ca_trust |
| 7 — DNS | dns_resolver |
Secrets there go through Ansible Vault rather than a hand-written .env, and every guard rail described here — the directory mode, the two TLS probes, the actual provider resolution — is an assertion run on every deployment, not a line of documentation. That’s the difference between a trap you remember and a trap that can no longer spring.
What it looks like in production
At my place, this stack runs on a 4-core Proxmox VM, behind a Caddy instance terminating TLS with an internal CA, with a Pi-hole carrying the .internal names and a Komodo agent watching the containers — Docker socket mounted read-only, so it sees everything and can drive nothing. In other words: steps 6 and 7 of this tutorial, for real, plus an observability console deliberately denied the right to act.
Three READMEs in the repo go further than an article could, if you want to dig:
roles/dns_resolver/— the mental model of the sticky failover, whysystemd-resolvedcannot fix it alone, and why the task order is itself a guard railroles/internal_ca_trust/— the four probes that prove TLS trust, host-side and container-side, and why the root certificate is committed to the reporoles/komodo_periphery/— read-only observability, and the single-use onboarding key that gets consumed on first contact
Treat them as a reference implementation, not a template to copy: the addresses, hostnames and sub-project split are mine. What transfers is the decisions.
The role of vibecoding in this project
The reference implementation — five Ansible roles, their Jinja templates, permission handling, handlers, wait_for calls — was largely written through vibecoding with Claude Code. Mechanical tasks lend themselves to it very well.
What did not come from the AI is the diagnosis. The sticky failover in systemd-resolved was found by reading man resolved.conf and correlating the time of a timeout with the disappearance of internal names. The per-key rather than per-file boundary was born from a real outage — a token wiped by a fully green deployment — and it’s by understanding why the task’s premise was false that I knew what to fix. The AI writes the task you describe very well; it doesn’t know the description is wrong.
The design decisions stayed on my side too: refusing bridge mode despite its apparent simplicity, requiring every guard rail to be proven by an assertion rather than documented, and accepting a loud failure over a silent DNS fallback.
What it changes day to day
The agent runs continuously. I reach it from Telegram when I’m away from my desk, and from the dashboard when I need to look at its sessions. It keeps its memories between conversations, which completely changes the relationship with the tool: no more re-explaining the context every time.
One last point, and it applies to you too: /opt/hermes/data is the only directory whose loss is irreversible. Memory, skills, sessions, scheduled tasks. Everything else in this tutorial replays in thirty minutes. Back it up from day one — a daily tar in a cron job is enough to start:
sudo tar czf /var/backups/hermes-$(date +%F).tar.gz -C /opt/hermes dataIf you build the same thing at home, I’d love to hear about it — especially the reports that start with “mine broke differently”.